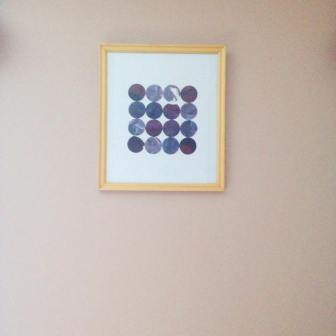
I like paints, a lot. In fact, I used to go to art lessons for 6 years, from 6 to 12, But anyway, today I’m going to be making this beautiful and eye-catching painted circle wall art.
What you’ll need:
- A card/thick paper for every colour chosen
- paints (as many as you want)
- a circular hole punch or circle stencil
- frame
- paintbrush
- pencil
- scissors
Sign up for 15% OFF coupon at choies, free shipping worldwide
Method:
Layout your card onto a flat surface and grab your paints. For each card, assign a paint to it. With your paint brush and paints, gently paint however onto your card. This process can be as messy or clean as you like, if you leave white areas, it is fine as it adds contrast to your finished work. Continue doing this with all your paints.

Once they are dry, grab your circle stencil or hole puncher and cut out as many circles as you can fit onto another piece of card that will fit in your frame. Align and glue them next to each like the picture below.

Once the glue has tried, pop it in your frame and you’re done! Toodledoo!
-Erika xx


Lovely post, dear!
xo.
FROM HATS TO HEELS
http://www.fromhatstoheels.com/fashionchick-elke-dag-een-look/
LikeLike
thank you 🙂 x
LikeLike
Such a cute blog!
xo.
FROM HATS TO HEELS
http://www.fromhatstoheels.com/fashionchick-elke-dag-een-look/
LikeLike
thank you!xxx
LikeLike
This actually is a great idea! Love how simple it is to create, and the end product is so chic.
Velveteencockroach
LikeLike
it is, isn’t it? thank you 🙂
LikeLike